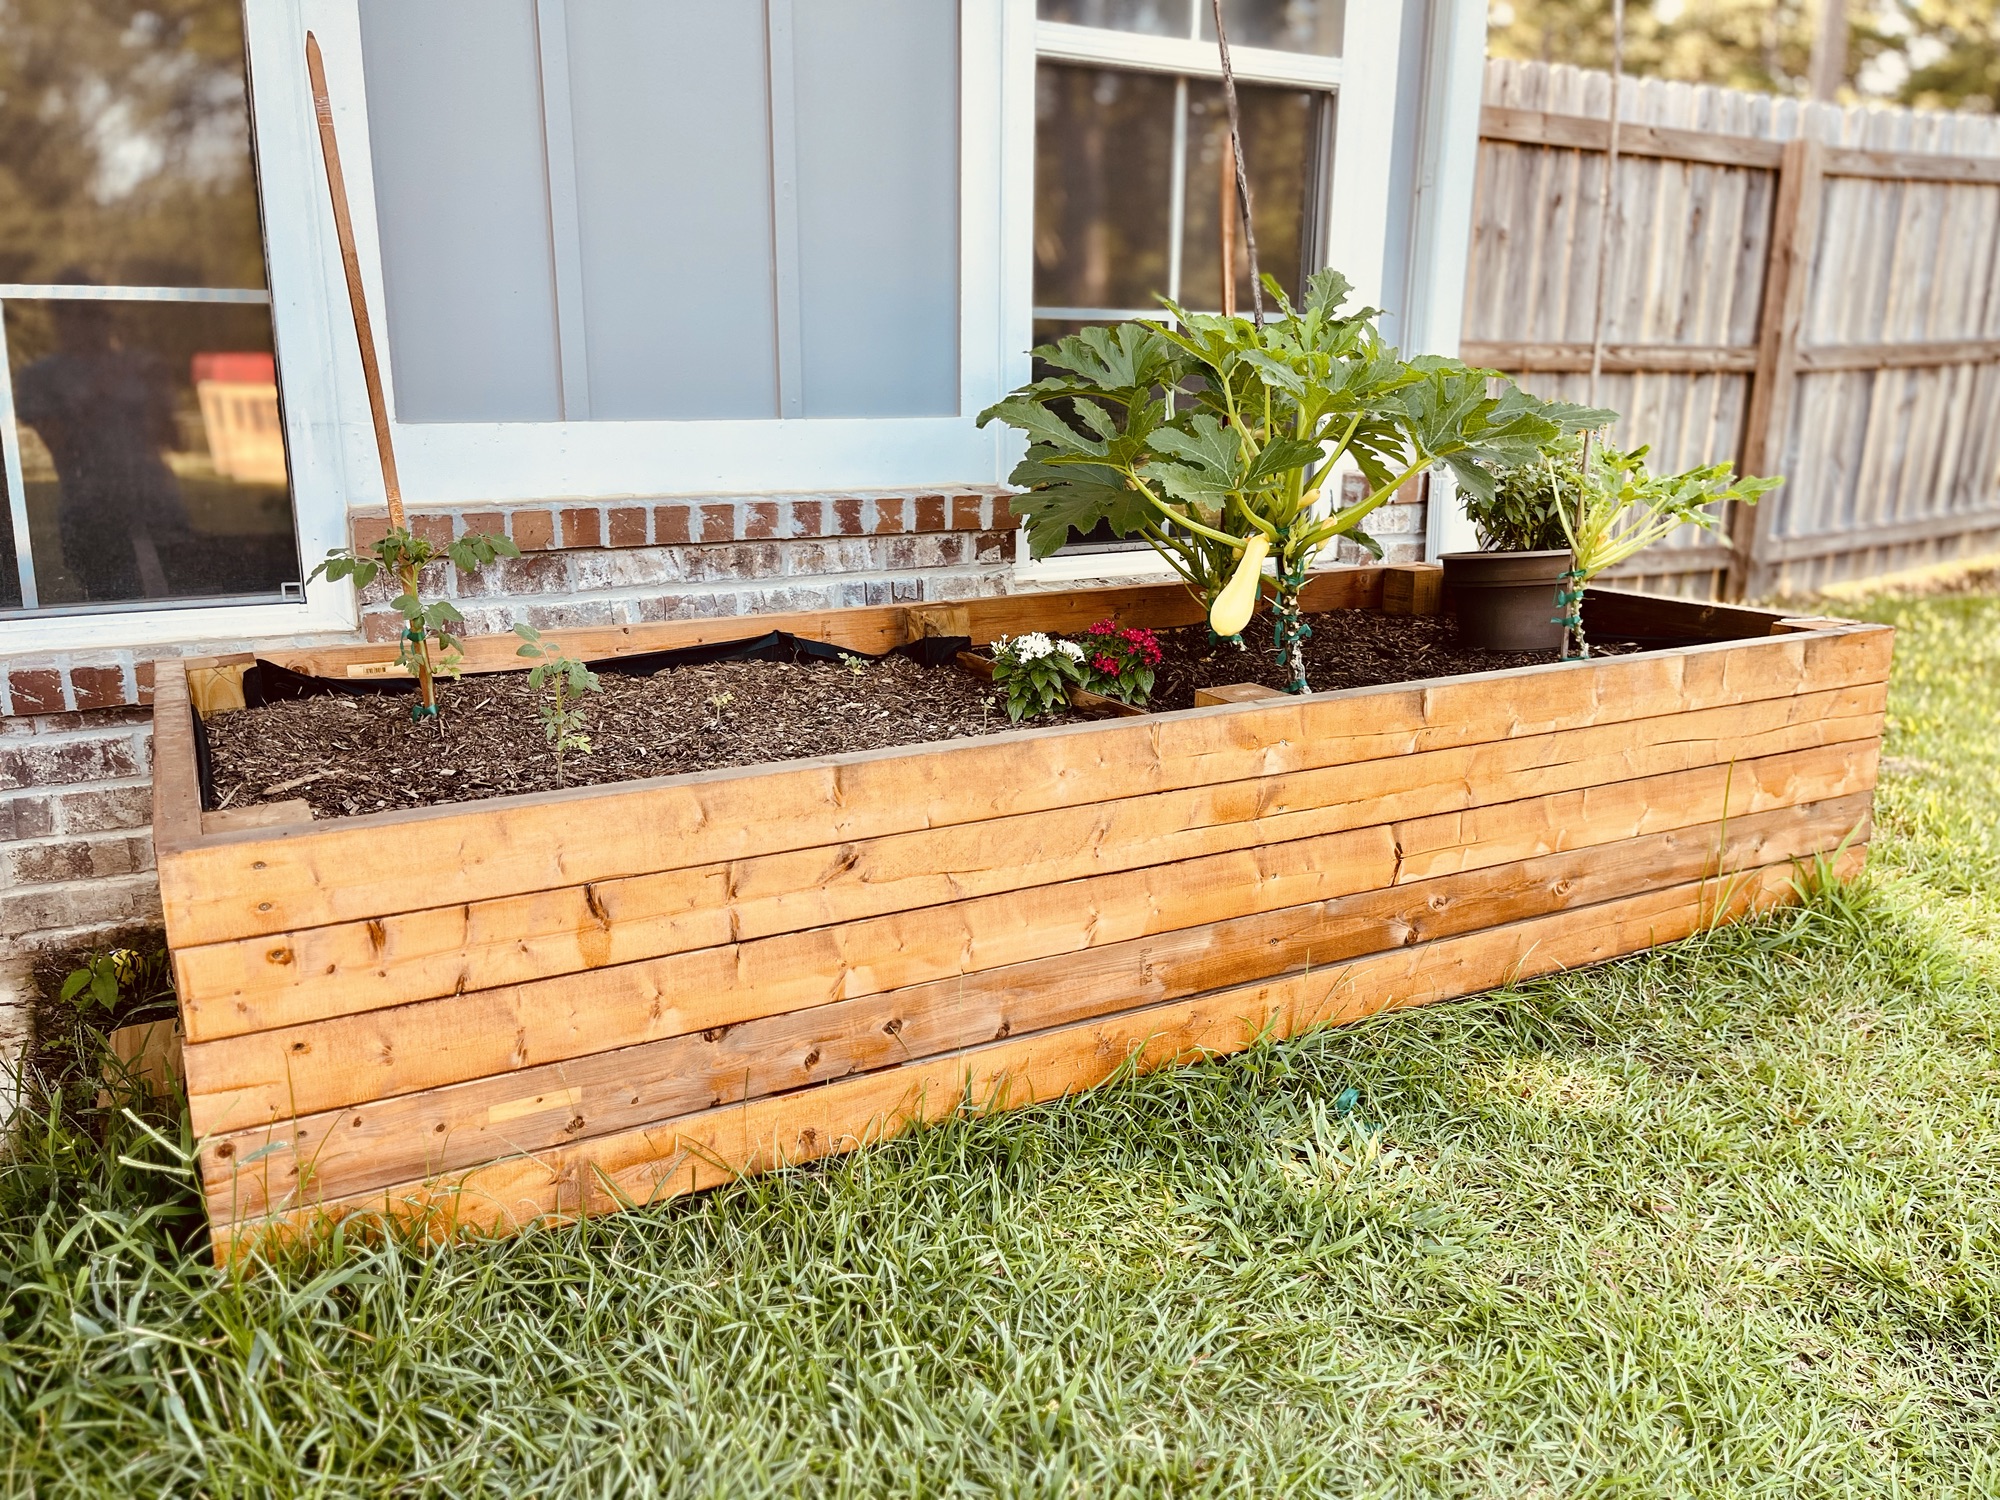
On top of teaching, coaching, and managing two year old twins, I thought it would be the perfect time to start a garden!
I live in a subdivision with a smaller backyard and my husband wouldn’t like me digging up his newly grown grass he has spent months on, so we compromised with the raised garden bed!
If you are in the same boat as me or just don’t want to break your back working on a regular garden, then follow my guide to this simple and cheap DIY raised garden bed!

The reason for the depth is to accommodate what I’m growing in it. Squash and tomatoes! They require at least 18” of growth depth. This will be plenty!
How Much Did it Cost Me?
I was lucky enough to have spare lumber and other materials around so the cost for me might be different for you, but my project for one raised bed only cost me $30 dollars!
I was out of screws or it wouldn’t have cost me anything.
Starting fresh, you are looking at it costing you less than $100, which to me is not that bad for a project like this.
Materials Needed
- (15) 2x4x8’ Lumber
- (2) 4x4x8’ Post
- (1) 4’x8’ – 1/4” Plywood (I would recommend sanded)
- (1) box of #10 x 2-1/2” Exterior Screws
- Exterior, waterproof stain (Optional)
Tools Needed
- Impact
- Drill
- Miter Saw
- Skill Saw
That doesn’t seem too bad, right! It’s a very minimal but easy setup.
How to Build Your Raised Bed
I started off by cutting all my pieces to the lengths I needed. The easy part is that the front and back pieces of your garden bed is 8’ long, so set those aside cause you’re done!
- 2×4 Front & Back: 8’ Long x 10
- 2×4 Sides and Bottom: 3’3” Long x 12
- 4×4 Posts: 22” Tall x 6
- The plywood will be cut once everything is put together
Let’s Build!
I started by laying (2) 4×4 posts flat on the ground, then laid the first 3’3” – 2×4, flush to the top of the 4×4 post.
Once you screw the first board down, continue with the next 4 boards, all flush to each other.

Repeat this step to the next side!
Now that you have your two ends, we can add your 8’ boards!

Set your two 3’6” ends on its side then you can lay your 8’ board along and repeat the process of screwing your boards down. What a back saver!
Flip your 3 sides around and repeat the process. You’re 3/4 of the way complete!
Next thing you want to do is put a little stability in the middle of your bed to help hold the weight of your soil.

Take the last two 4×4 posts and attach those along the center of your 8’ long board.

Now, flip the garden bed upside down and attach (2) 3’3” – 2×4’s flush to the bottom of your 8’ long board. This will help gain some strength for your plywood.
Lastly, the plywood!
I just did the easy route and laid the plywood down then set my garden bed on top and marked where I needed to cut.
I did two separate pieces but feel free to make it all one piece!
Once you cut your plywood, just set it in and screw it down to the stability boards inside the bed and along the bottom edges of your bed.
To top it off, place a nice stain on the outside of your raised bed. This step is completely optional!

Here is what it should look like once you are done!
I hope this job is as easy as it was for me. Once you get one down, then the next one will be built even quicker!
That’s it! A super easy, made to last raised garden bed that will help you grow tons of food for your family!
PIN ME FOR LATER

Need More Ideas?
© Copyright 2024. All rights reserved.

